Notifications
Clear all
Topic starter
22/10/2019 7:34 pm
Anyone has a clue what I'm trying to re-create in 3D? First hint, she has a bubble top.

23/10/2019 8:45 am
hm, Ford Beatnik? - it's the first result in Google by "car with a bubble top" 😀
Topic starter
24/10/2019 10:56 am
No no no, it is an Italian car. But my words came out a bit wrongly. The car has a double bubble roof. This is a feature the famous designer used for a lot of carsof many brands.
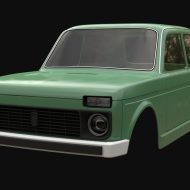
Topic starter
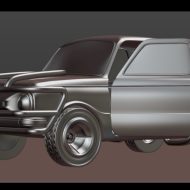
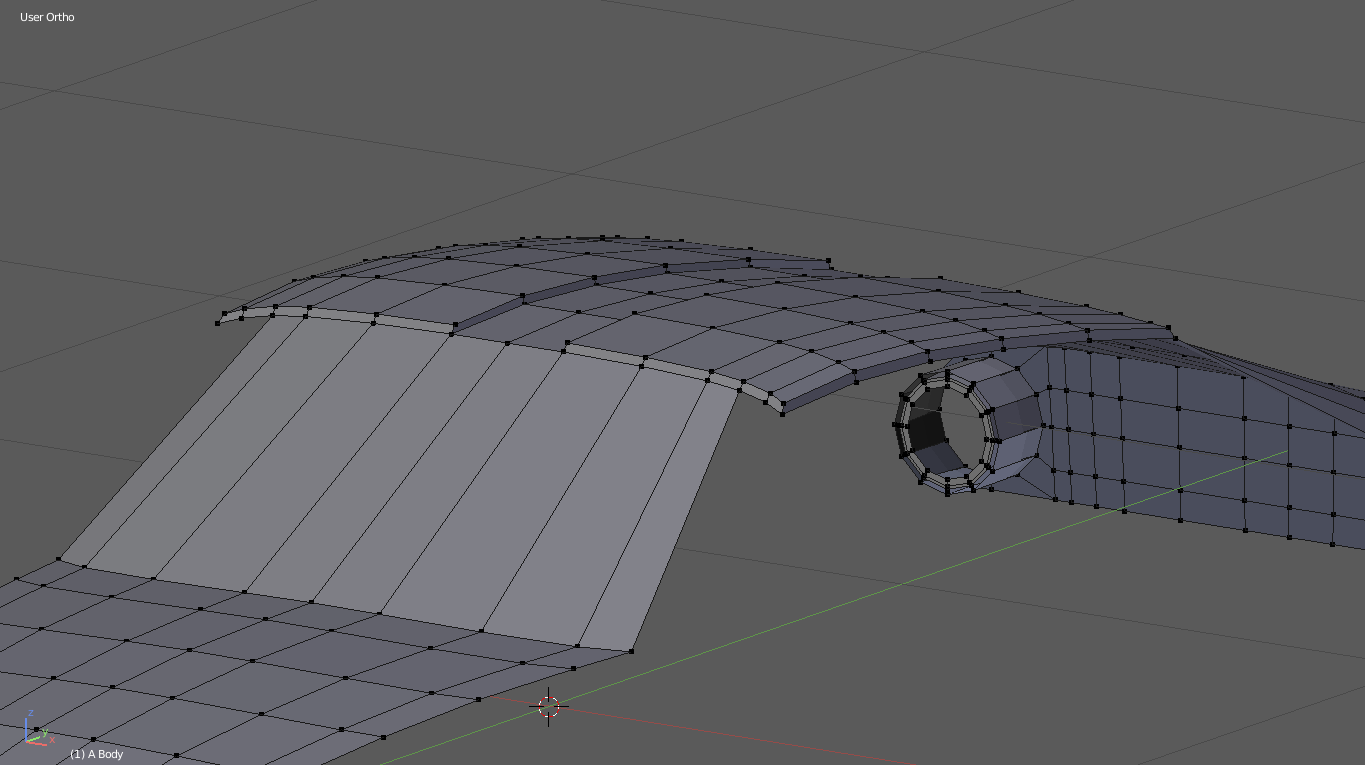
24/10/2019 11:12 am
I spend my time yesterday trying to get the curves of the fenders correctly lined up with extruding, scaling and came this result.
But then I was pretty uneasy with the way I have adjusted the rear panel around the tail lights by moving single vertices. And then I noticed another problem. The car has had 3 facelifts during the time she was produced and even though I have an original copy of the blueprint the designer made, I came to the conclusion the blueprint is having the front of the third facelift and the rear of the last facelift. So I've decided to go a few steps back and will include pictures of the car with the right back end.
So even though, I lost a lot of time drawing things to wrong way, I started today rebuilding the trunk and tail lights with minimum effort. So although connecting the rear with the front might give me some problems, I think I'm on the right track and I'm hoping to complete the side panels from front to rear with minimum effort. So this is what I have so far, I'm really happy with the progress I am making, even though, since I'm a beginner, I keep learning a lot.
Serhii reacted
Topic starter
24/10/2019 12:39 pm
Although I thought it would be kind of easy for now, I've decided to leave the rear panel alone for now. I have been thinking about easy methods to get it easily to the desired form, I notice I spent to much effort on it for 2 days, I've decided to focus on other areas for now and it will probably be the roof. The tail panel is crucial for me to get it right to form the side panels. I knew this car was a pain in the butt according to my standards, like I said before, I can't handle myself drawing an actual car with wrong measurements, but I know, there are easier ways with minimum effort to get the shape right on. I'm absolutely positive I will have an amazing end result, but due my lack of experience and the complicity of the car, I might not meet up the goal in time, but she will get finished. And for me, that is what it is all about. So, it might take a few days for me to upload my progress, I'm determined to get her online as a 3D accurate model of an Italian beauty in Texas. I'll see you in the next update and good luck to everybody, I've already seen amazing projects, I feel all the participants have amazing skills. I love to see all the progress you all make. Thank you for that.
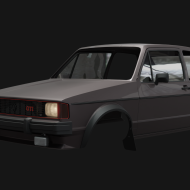
Topic starter
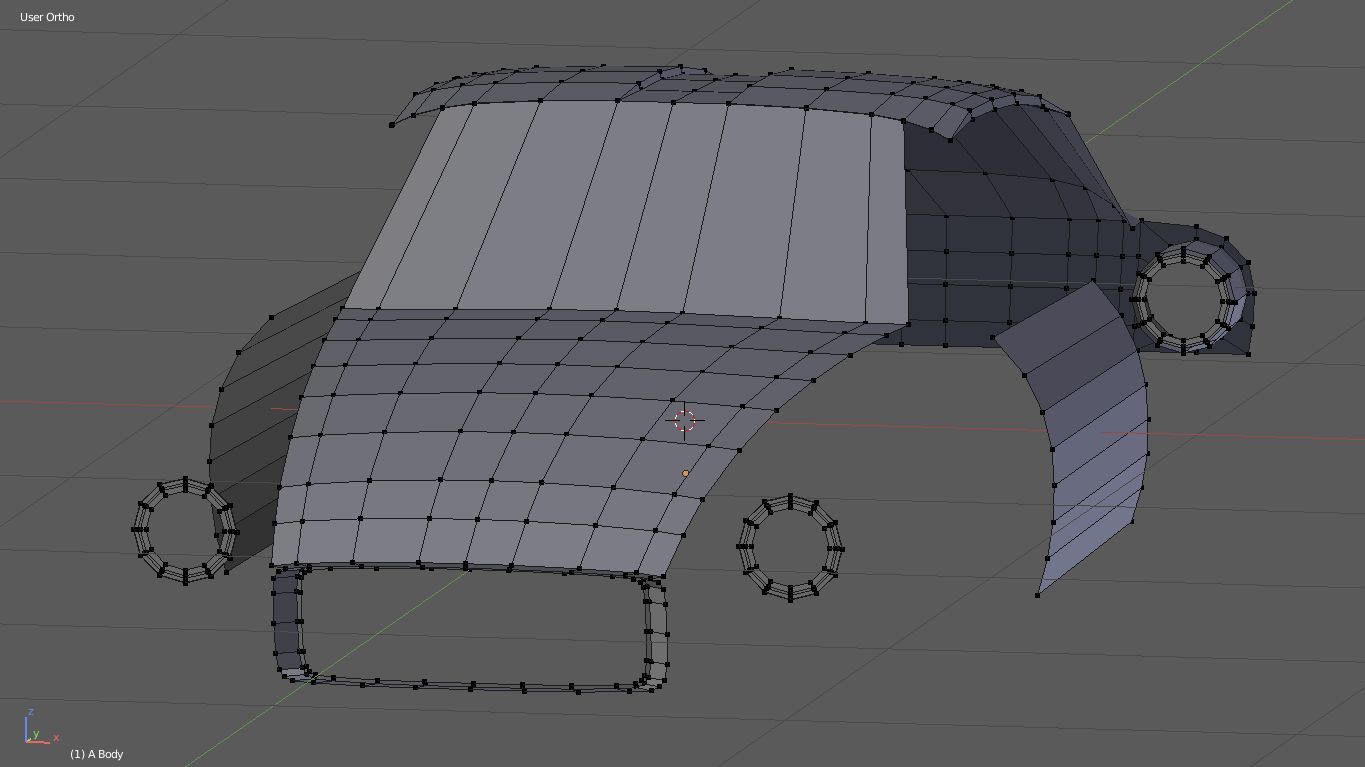
24/10/2019 2:25 pm
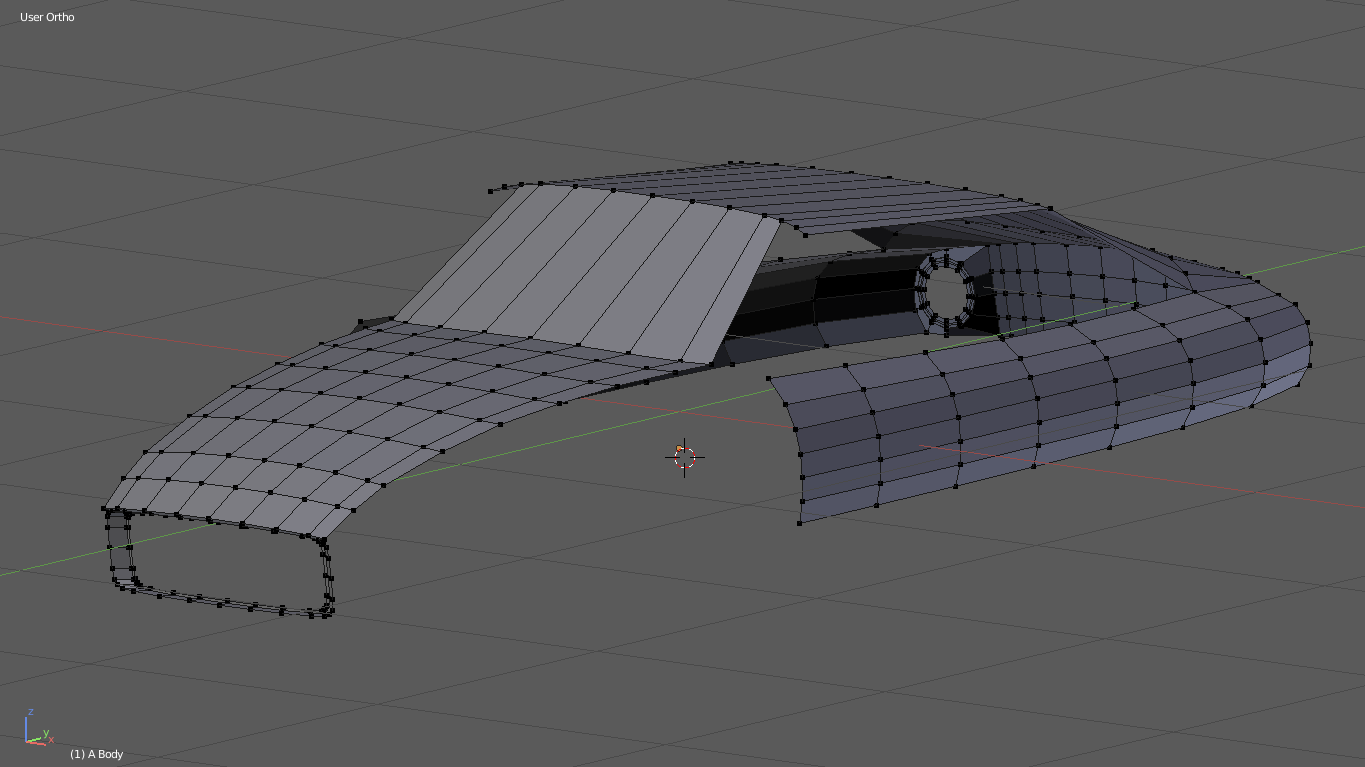
I've been playing around with the double bubble top roof, I think I'm close, with less effort, though I see a few problems. I've got duties to do, in the meantime I'll think about things, so here are 2 pictures of my progress. I have to add, I hate compromising and might go to make it myself much easier to get a best result.

This last picture means, I always safe my progress, when I'm not satisfied, I don't mind going a thew steps back. But I learned a few things again and I improve myself by solving the mistakes I made in the past. It's a common saying that you have to start easy, but I truly believe, trying at the hardest level and fail will make you an amazing 3D artist.
Topic starter
24/10/2019 8:02 pm
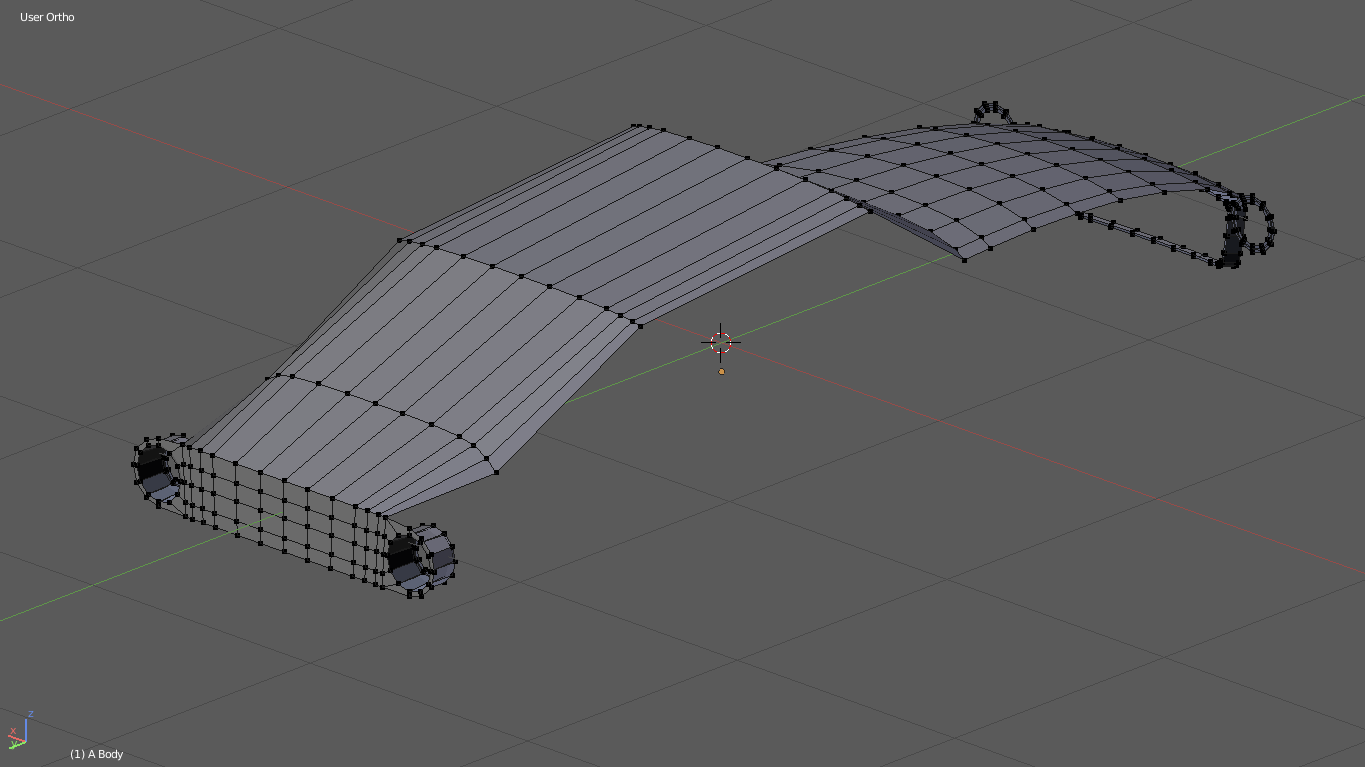
I had half an hour left, so I did the basic form of the double bubble roof and the doors.
Tomorrow is another day.
Topic starter
28/10/2019 2:12 pm
Hello everyone,
I had this idea in my head that with moving, scaling and rotating edges and vertices was going to give me the result I needed, after playing around a lot of this method, I came to realize that this method doesn't work out for me. I was starting to move single vertices on the edges and that could have worked out for me, I was not satisfied that this method was the ideal one.
Also I noticed that the front, back, side and bottom view of the original handmade blueprint of the designer were not lined up as I wished they would be, so I need to get a workaround for this problem. Then it occurred to me, several days ago, that the last facelift of the car is not incorperated in the blueprints. This means, I've got to adjust it myself according to the numerous photos I gathered on the web.
I'm not giving up though. I had not much time to draw this weekend, but when I started today, I concluded I forgot to save my progress on the roof before making the double bubble head. I noticed, that the lines of the side windows were not adjusted in time, giving me the idea it will give me a tons of work more to get all lines smooth in the end by just moving vertices. And that is exactly what I'm trying to avoid, because this will be a time consuming process, which I still believe is unnecessary.
I still learned so much of this. But after a quick consideration with myself, I've decided to start all over again only keeping the grille, I'm positive this is accurate. So it might take a few days to give a new update, I know for myself, this was the right decision and I've found new ideas the include all previous mentions problems in a better accurate design of this gorgeous car with less effort. I will finish her. maybe not in time for the challenge, but I'm determined to finish her trying with less effort.
More practice is more knowledge means a better end result and that is what I'm going for.
Serhii reacted
Topic starter
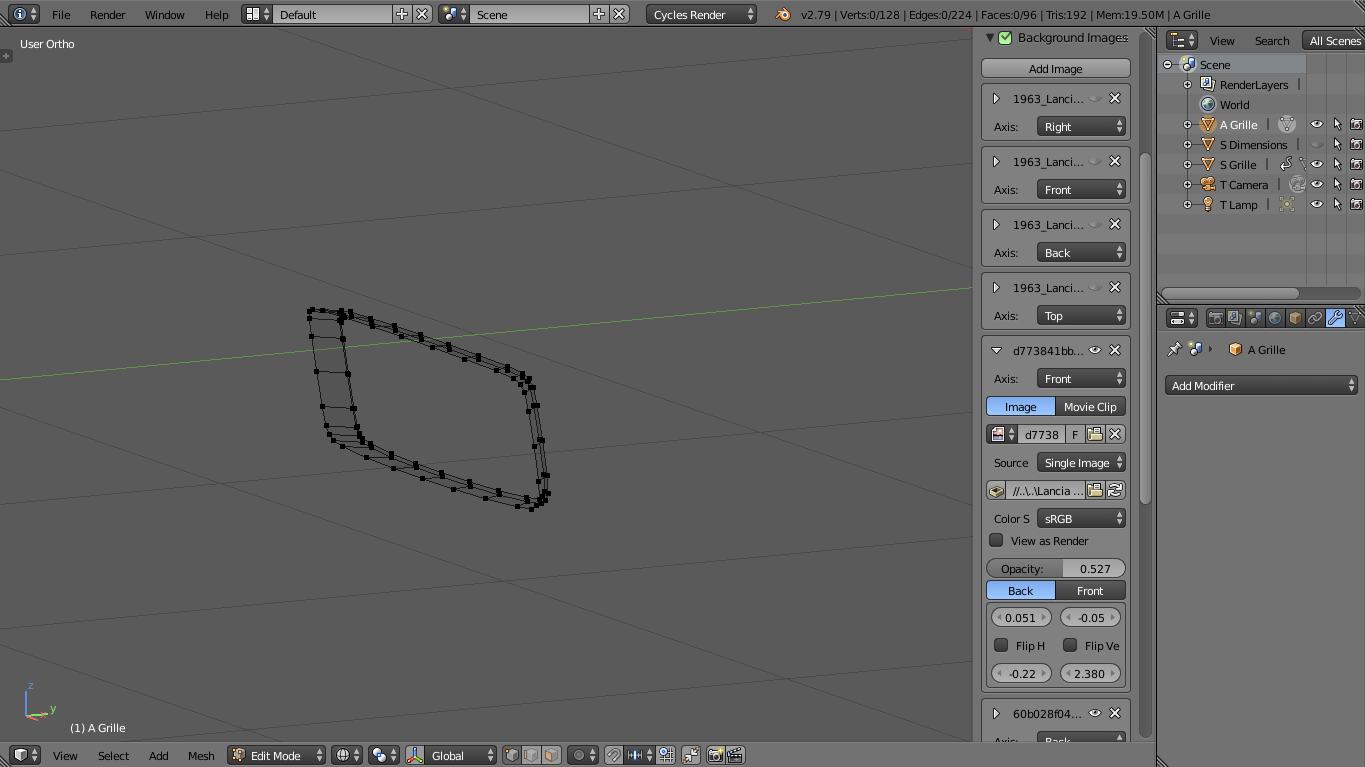
28/10/2019 2:57 pm
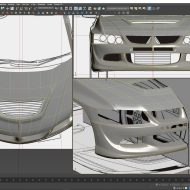
I forgot to mention one thing. My 3D copy of this car will not include any triangle. Considering a lot of helpful tutorials on Blender 2.79 and before, I've learned they are bad and I've noticed why. So this is why I'm going to avoid this fully. Same to say for 5, 6 and so on divided squares. The functional reason is, you can always divide them by 4, forgiving me trying to translate this out of my own language, in the end you can give the designed object a higher resolution. By including only 4 vertices squares, they can always be divided. Probably this is not only a rule in Blender, I'm confident this rule applies to any other 3D program.
I've seen tons of Blender tutorials before, triangles are a really bad thing to use to easily try to solve a problem in the overall design. So this is not for me. When my design is done, it can be divided to new higher standards in the future. This rule only using squares with 4 vertices or edges is inevitable to keep a model alive to get it to a next higher level. I hope this makes sense.
Topic starter
04/11/2019 9:24 pm
Hello everyone,
Considering I'm not determined to win this contest, I'd like you to know where I'm standing right now. I came to realize as a beginner artist, trying to keep my progress as so far, I really needed to start from scratch. The model I'm recreating has perfectly round head and tail lights. Learning in the process starting with the grille seemed to be spot on to me, I figured out, for me trying to find the easiest way to create this middle starting from the center, was a huge failure.
So therefor, I even removed my idea to keep the grille, I was seduce to keep as much as progress that I had before, I really started the model by scratch. I've decided to start all over with the perfectly round head and tail lights and then move my way way with minimum effort to the middle axis of the car. After failing numerous times the last couple of days to try to design a clean model with minimum effort and failed, I truly believe, this will work out for me.
So to let you know, I fell, numerous times, I'm still in the race of trying to give an most accurate 3D model of a gorgeous, but beautiful spot on recreation of a true existing hand made Italian car and maybe I'm not in time for the end of contest, as a beginner, I learned a lot, my dream is to design a one of spot on true duplicate in 3D of one of the most gorgeous Italian sport cars in the world. I hope to the end of the week to show my progress.